How do I manually add my authenticator app to MFA (without using the QR code)?
If you are looking for information on how to enroll in Multi-Factor Authentication (MFA), please visit this page.
If you’d like to change the way you receive your MFA code after enrollment, visit this page.
Please note that if you are traveling and not taking any of your devices with you, you will only be able to access your banking by calling Member Services. If you know ahead of time that you won’t have access to your phone or device where you receive your MFA code, please make sure to change it in advance. You can receive the MFA code on any device that has your authenticator app (i.e., phone, tablet, laptop, etc.), we do not offer MFA via email. You can find a step-by-step guide on this page.
If you are already abroad or don’t have access to your phone, you will not be able to change the way you receive your MFA code. Please call Member Services so we may assist you in accessing your banking:
Monday to Saturday: 8 am to 8 pm, Sunday: 10 am to 5:30 pm
Vancouver: 604-877-7000
Victoria: 250-519-7000
Toll-free: +1-888-826-2489
International: +IAC-800-826-2489-0
(IAC = International Access Code, varies by country)
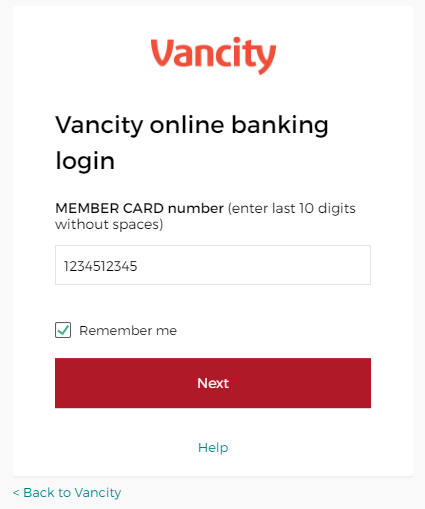 |
Step 1:
Enter your MEMBER CARD number and select ‘Next’. |
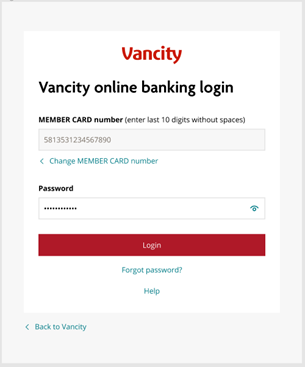 |
Step 2:
Enter your Password and select ‘Login’. |
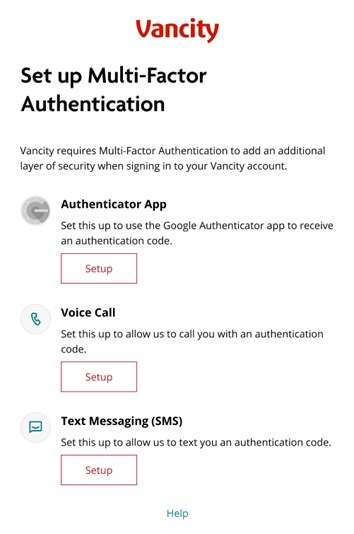 |
Step 3:
Select ‘Setup’ under ‘Authenticator App ’. |
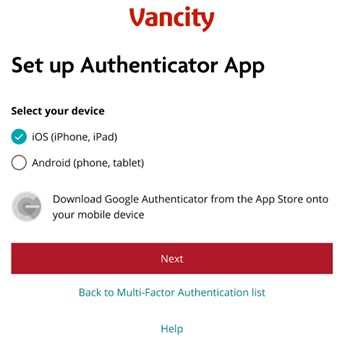 |
Step 4:
Select your device then select ‘Next’. |
 |
Step 5:
From your device, open the Google Authenticator app. |
 |
Step 6:
Select “+” from the bottom-right corner. |
 |
Step 7:
Select “Enter a setup key”. |
 |
Step 8:
Back on your device, on the QR code screen, select “Can’t scan?”. |
 |
Step 9:
Notice the code included in the field. You will need that code in the next steps. Please note you will not be able to copy-paste it. |
 |
Step 10:
Go back to the authenticator app. Enter the following details:
Step 11: Verify that the key type is “Time based”. Step 12: Select ‘Add’. |
 |
Step 13:
You will see the code listed in the app.
|
 |
Step 14:
Back on this screen, select “Next”. |
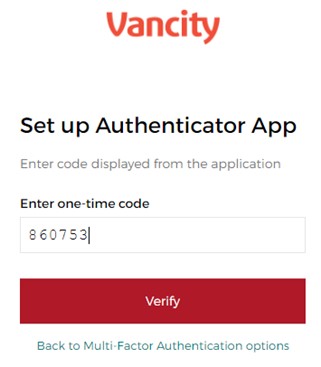 |
Step 15:
Enter the one-time code and select ‘Verify’. |
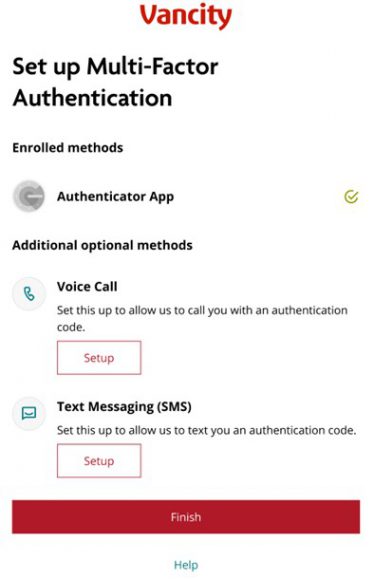 |
Step 16:
Once the Authenticator App is successfully set up, select ‘Finish’. |


