With so many bills to keep track of, it’s easy to forget a payment. You can set up pre-authorized payments and schedule bill payments to ensure your bills are paid on time, every time, whether you remember them or not. There are 2 ways to set up an automatic payment:
| Scheduled
(at a later date) |
Recurring | |
| 1. Pre-authorized payment (set up with your vendor) | ❌ | ✔ |
| 2. Scheduled bill payment (set up in online/mobile banking) | ✔ | ❌ |
1. What is a pre-authorized payment?
- A regularly scheduled payment to a vendor from one of your accounts, usually monthly. Each month, the payment will be debited (paid) from your account
- Some popular vendors include: hydro and other utilities, loan payments, mortgage payments, credit cards, strata fees, insurance (ICBC), municipal taxes, etc. Learn more
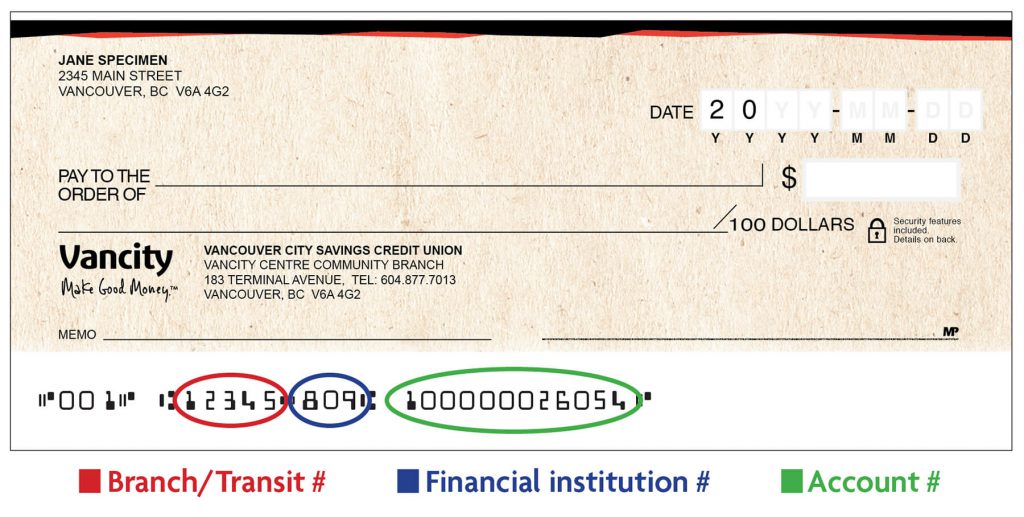
- To set it up, simply go to your online banking account and download a void cheque where you can find all the information you need.
You can download a void cheque by following the steps below.
| Step 1:
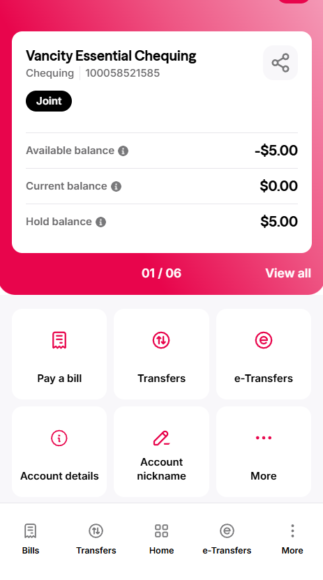
Log in to online banking and select the account you want your direct deposit or pre-authorized payments to go through. |
 |
| Step 2:
Once you’ve selected the account, click on the link that says ‘More’. Note: If you have a joint account, only the account holder that is logging in will see their name displayed on the direct deposit form. You will not be able to see both names. |
 |
| Step 3:
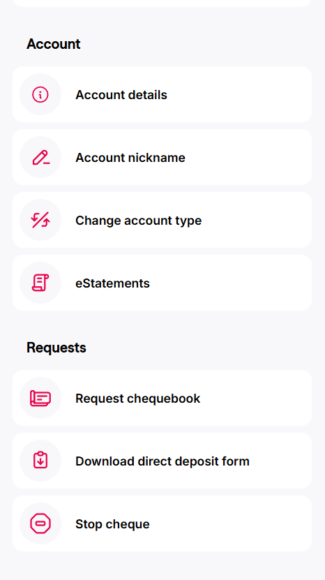
In the popup window, select ‘Download direct deposit form’. |
 |
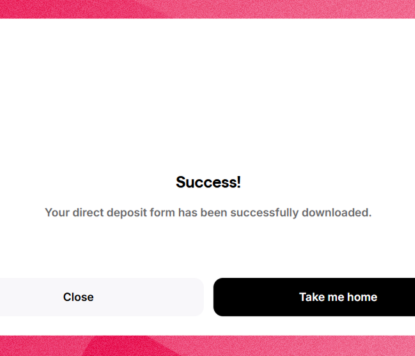
| Step 4:
The PDF containing the void cheque will be downloaded followed by a success message. The first number (listed “16320” on example) lists the branch/transit number. The second number (listed “809” on example) lists the financial institution number. |
  |
Alternatively, you can set up by obtaining the instructions from the vendor directly. You may need to submit a form by mail or online. The vendor will ask for either a blank voided cheque or account details, such as your transit, financial institution, and account number. To locate them, please refer to the above and “How do I find my branch/transit number, financial institution number and account number?” for more detailed instructions.
| Step 1:
Log in and scroll down to select the account you want to pay your bills from. |
 |
| Step 2:
Scroll down and select ‘More’. |
 |
| Step 3:
Scroll down and select ‘Download direct deposit form’. |
 |
| Step 4:
The PDF containing the void cheque will be downloaded followed by a success message. The first number (listed “16320” on example) lists the branch/transit number. The second number (listed “809” on example) lists the financial institution number. |
 |
2. What is a scheduled bill payment?
Schedule a future-dated payment(s) on your own using online or mobile banking. Here’s how:
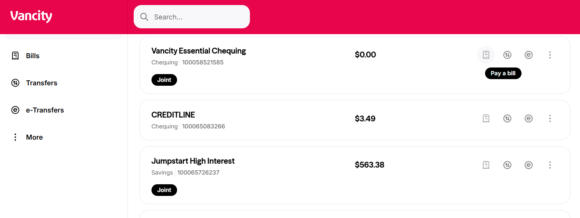
| Step 1:
Log in to online banking and click ‘Pay a bill’ for the account you would like to pay from. |
 |
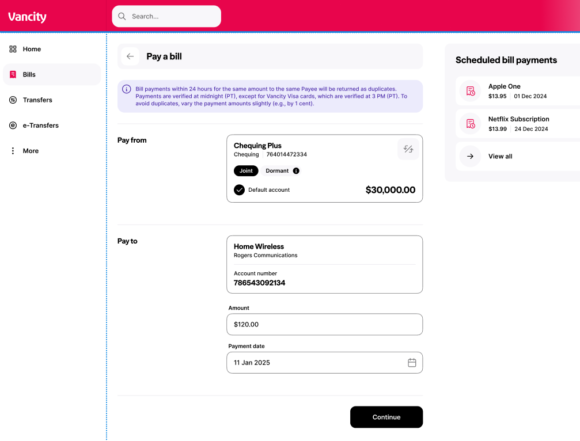
| Step 2:
Setup a payee and change the payment date to a future date to schedule a payment. Click ‘Continue‘ when ready. |
 |
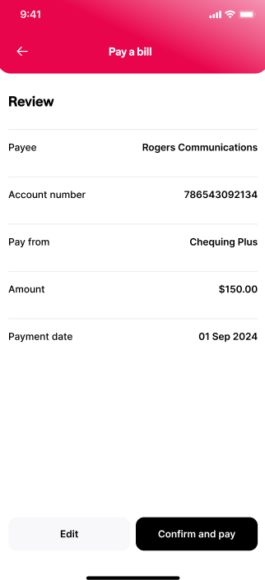
| Step 3:
Review payment details and click ‘Confirm and pay’ when ready. |
 |
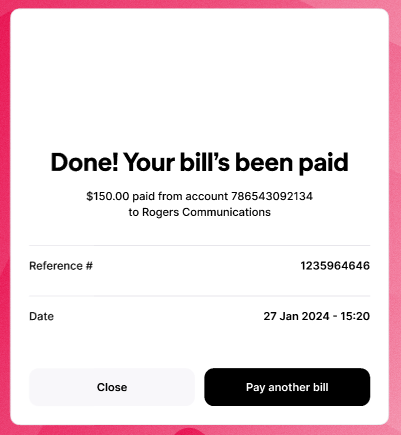
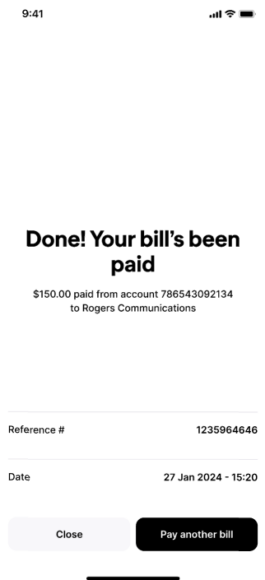
| Step 4:
You will get a confirmation with date and amount paid. |
 |
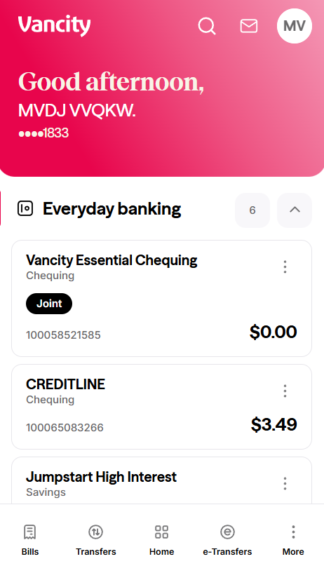
| Step 1:
Log in to the Vancity mobile app. Tap the 3 dots beside the account you would like to pay from. |
 |
| Step 2:
Tap ‘Pay a bill’ on the popup screen. |
 |
| Step 3:
Setup a payee and change the payment date to a future date to schedule a payment. Click ‘Continue’ when ready. |
 |
| Step 4:
Review the details of payment and click ‘Confirm and pay’ when ready. |
 |
| Step 5:
You will get a confirmation with date and amount paid. |
 |